
Follow These Steps
- Preheat Your Oven : Set your oven to 350°F (175°C). Prepare a 9×13-inch baking dish by greasing it lightly with cooking spray or butter.
- Mix the Dough : In a large mixing bowl, combine flour, sugar, and melted butter until the mixture resembles coarse crumbs. Reserve one cup of this mixture for later use.
- Form the Base : Press the remaining dough evenly into the bottom of the prepared pan. Ensure the layer is firm and uniform.
- Bake the Crust : Place the pan in the preheated oven and bake for approximately 15 minutes. Remove once slightly golden.
- Add the Filling : Spread the canned cherry pie filling evenly across the partially baked crust.
- Apply the Topping : Sprinkle the reserved crumb mixture over the cherry layer, ensuring full coverage.
- Finish Baking : Return the pan to the oven and continue baking for another 25–30 minutes, or until the topping turns golden brown.
- Cool and Slice : Allow the bars to cool completely before cutting them into squares. Patience here ensures cleaner slices!
Pro Techniques for Flawless Results
Even though cherry pie bars are relatively simple to make, mastering a few tricks can elevate your results significantly. Consider these tips:
- Chill the Dough : Before pressing it into the pan, refrigerate the dough for about 30 minutes. This step helps prevent crumbling and ensures a sturdier structure.
- Check Doneness : Insert a toothpick near the center of the bars. If it comes out clean, they’re ready.
- Enhance Flavor : Incorporate additional elements like lemon zest, cinnamon, or chopped nuts to deepen the overall taste profile.
By incorporating these strategies, you’ll achieve consistently impressive results every time you bake.
Get Creative with Your Recipe
One of the joys of working with recipes lies in personalizing them according to your preferences. Here are some ideas to inspire creativity when making cherry pie bars :
- Substitute the cherry filling with alternatives like blueberry, raspberry, or peach.
- Introduce spices such as ginger or cardamom for a warming twist.
- Opt for gluten-free flours if dietary restrictions apply.
- Add chocolate chips or shredded coconut for extra indulgence.
Remember, experimentation leads to discovery. Feel free to tweak the recipe until it aligns perfectly with your palate.
Frequently Asked Questions About Cherry Pie Bars
Let’s address common queries surrounding cherry pie bars to clarify any doubts you may have.
- What Are Cherry Pie Bars?
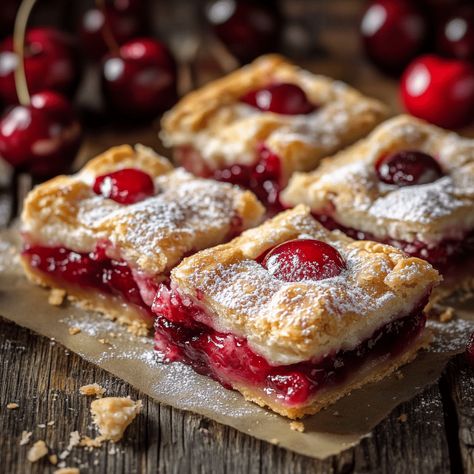
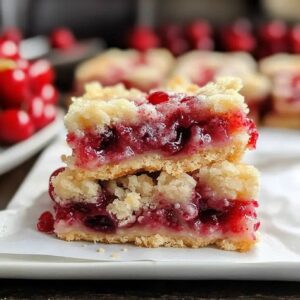
These are square-shaped desserts featuring a buttery crust, cherry filling, and crumbly topping. They resemble smaller versions of traditional pies but are far simpler to prepare. - Can I Use Fresh Cherries Instead of Canned Filling?
Absolutely! Pit fresh cherries, simmer them with sugar and cornstarch, and voilà—you’ve got homemade filling. - How Long Do Cherry Pie Bars Last?
Stored properly in an airtight container at room temperature, they remain fresh for up to three days. Extend shelf life by freezing portions individually. - Are Cherry Pie Bars Healthier Than Regular Pies?
Depending on the recipe, bars tend to contain fewer calories and less fat compared to traditional pies. However, moderation remains key regardless of the dessert type. - Where Can I Find Cherry Pie Bars?
While homemade versions yield superior quality, specialty bakeries sometimes carry pre-made options. Otherwise, crafting your own guarantees freshness and customization.
A Sweet Ending
By now, you should possess ample knowledge to embark confidently on your journey toward crafting delectable cherry pie bars . From understanding their composition to learning advanced techniques, each piece of information shared aims to empower you in the kitchen.
As you experiment with different variations and share your creations with loved ones, remember the joy that baking brings. It connects us through shared experiences and fosters meaningful relationships. So, roll up your sleeves, embrace the process, and let the aroma of freshly baked bars fill your home.
Ready to try your hand at this delightful recipe? Share your photos and feedback in the comments below—we’d love to see your masterpieces! And don’t forget to bookmark this page for future reference. Happy baking!