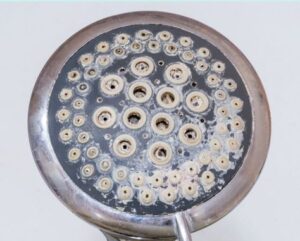
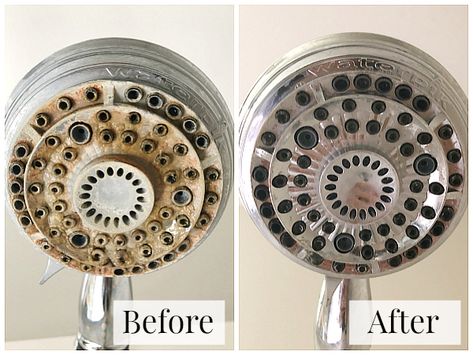
Imagine this: you step into your shower after a long, tiring day, only to find yourself staring at grimy tiles, streaky glass doors, and stubborn soap scum. Instead of feeling refreshed, you’re left wondering how something so essential can feel like such a chore. Cleaning the shower is one of those tasks that everyone dreads but knows they can’t avoid. But what if there was a way to make it easier? A trick so simple, yet so effective, that you could reclaim your weekends and enjoy a sparkling shower every single day.
This article dives deep into the ultimate solution for keeping your shower pristine without breaking a sweat. You’ll discover an easy-to-follow method that cuts through grime effortlessly, saves time, and even protects the environment. Let’s dive in and transform your cleaning routine today.

Why Is It So Hard to Keep Showers Clean?
Understanding Shower Grime
Shower grime isn’t just dirt—it’s a combination of factors working against you. Over time, mineral deposits from hard water leave behind unsightly stains on your fixtures and glass doors. Soap scum builds up as residue mixes with moisture, creating a slippery film that dulls surfaces. And then there’s mold and mildew, which thrive in damp environments, posing potential health risks if left unchecked.
According to a recent survey, over 60% of homeowners admit they dread cleaning their bathrooms weekly. If you’ve ever spent hours scrubbing away at stubborn spots only to see them reappear days later, you’re not alone. But understanding why these issues happen is the first step toward solving them.
Common Mistakes People Make While Cleaning Showers
Before we reveal the secret weapon, let’s talk about some common blunders people make when tackling shower cleaning:
- Using harsh chemicals: Many commercial cleaners contain abrasive ingredients that may damage surfaces or harm your skin.
- Skipping preventative maintenance: Waiting until grime becomes overwhelming makes the job harder than it needs to be.
- Not drying the shower after use: Leaving water droplets on surfaces allows minerals to settle and creates the perfect breeding ground for mold.
Avoiding these pitfalls will set you up for success—and make your life much easier.
The Secret Weapon: The Trick to Clean Your Shower Very Easily
Now, here comes the part you’ve been waiting for—the game-changing trick that will revolutionize your shower-cleaning routine. What makes this method stand out isn’t just its simplicity; it’s also incredibly affordable and eco-friendly. Plus, it works wonders on all types of surfaces, whether you have glass doors, ceramic tiles, or acrylic panels.
What Makes This Trick So Effective?
The magic lies in two powerhouse ingredients: white vinegar and baking soda. Vinegar naturally breaks down mineral deposits and soap scum, while baking soda acts as a gentle abrasive to lift tough stains. Together, they create a dynamic duo that cuts through grime faster than any store-bought cleaner. And because both are non-toxic, you won’t have to worry about exposing yourself or your family to harmful chemicals.
Step-by-Step Guide to Cleaning Your Shower with Ease
Ready to put this trick into action? Here’s everything you need to know:
Gather Your Supplies
First things first—make sure you have the following items handy:
- White vinegar
- Baking soda
- Microfiber cloth
- Spray bottle
- Optional: Essential oils for fragrance
These supplies are inexpensive and readily available at most grocery stores.
Follow These Simple Steps
- Mix equal parts vinegar and water in a spray bottle. This solution serves as your primary cleaning agent.
- Sprinkle baking soda on tough stains. Focus on areas where soap scum or mineral buildup tends to accumulate.
- Spray the vinegar solution generously over the area. Watch as the mixture fizzes slightly—a sign that it’s actively breaking down grime.
- Let it sit for 10–15 minutes. During this time, the solution penetrates deep into layers of dirt and residue.
- Scrub gently with a microfiber cloth. No elbow grease required! The solution does most of the work for you.
- Rinse thoroughly with warm water. Ensure all traces of the cleaning solution are removed.
- Dry surfaces with a squeegee or towel to prevent streaks. This final step keeps your shower looking polished and prevents future buildup.
And voila! In less than 30 minutes, your shower will look brand new.
Maintenance Tips to Keep Your Shower Spotless Longer
Once you’ve mastered the art of quick cleaning, maintaining your results becomes effortless. Consider implementing these habits:
- Use a daily shower spray made from diluted vinegar to keep surfaces free of soap scum.
- Install a water softener to reduce mineral deposits caused by hard water.
- Wipe down glass doors with a squeegee after each use to eliminate water spots.
By staying consistent with these practices, you’ll minimize the frequency of deep cleans and extend the lifespan of your shower fixtures.

