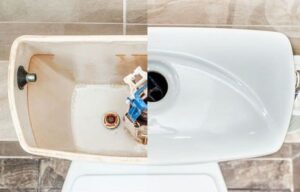
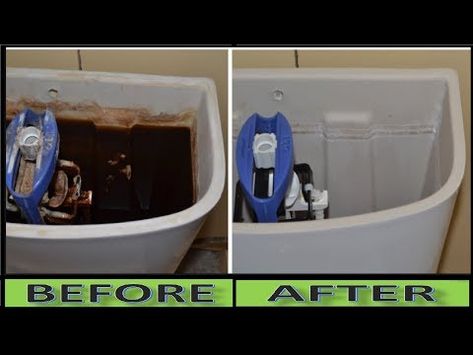
Imagine this: you lift the lid of your toilet tank, expecting to see clean water and smooth surfaces. Instead, what greets you is a layer of grime, mineral deposits, or even rust stains. Not exactly the picture of cleanliness you were hoping for, right? A neglected toilet tank isn’t just unsightly—it can also impact the performance of your toilet, cause unpleasant odors, and even lead to costly repairs down the line.
But here’s the good news: with a little effort and the right approach, you can restore your toilet tank to its former glory. In fact, by the time you finish reading this guide on how to clean the toilet tank and make it look like new , you’ll have all the tools and knowledge you need to tackle the task confidently. Let’s dive in and transform your toilet tank into a sparkling clean feature of your bathroom.

What You’ll Need Before You Begin
Before you roll up your sleeves and get started, it’s crucial to gather the right supplies. Having everything on hand will make the process smoother and more efficient. Here’s a checklist of items you’ll need:
Cleaning Supplies Checklist
- Rubber gloves : Protect your hands from dirt and bacteria.
- White vinegar : A natural cleaner that breaks down mineral deposits.
- Baking soda : Perfect for scrubbing away stubborn stains.
- Mild dish soap : Cleans without damaging surfaces.
- Soft scrub brush or sponge : For gentle yet effective cleaning.
- Microfiber cloth : Ideal for wiping down surfaces.
- Old toothbrush : Great for reaching tight corners and crevices.
- Bucket or container : Helps with draining and rinsing.
- Water-safe disinfectant (optional) : Adds an extra layer of hygiene.
Safety Precautions
Your safety should always come first. Keep these tips in mind:
- Turn off the water supply before starting any cleaning.
- Avoid harsh chemicals like bleach, which can damage rubber seals and gaskets.
- Wear gloves to shield your skin from dirt and cleaning agents.
By preparing properly, you’ll set yourself up for success and ensure the process goes smoothly.
1 – Emptying the Toilet Tank
To clean the tank effectively, you’ll need to start with an empty space. This allows you to access every surface without interference from water. Here’s how to drain the tank step by step:
How to Drain the Tank
- Turn off the water supply valve : Locate the valve behind the toilet and turn it clockwise to shut off the water flow.
- Flush the toilet : Press the flush handle to drain most of the water from the tank.
- Remove remaining water : Use a sponge or towel to soak up any leftover water at the bottom of the tank.
Pro Tip
If there’s stubborn residue stuck at the bottom, use a small cup or bucket to scoop out the last bits of water. This ensures you have a completely dry surface to work with.
2 – Removing Mineral Deposits and Stains
One of the most common issues you’ll encounter in a toilet tank is mineral buildup. These deposits often form due to hard water and can leave unsightly stains on the tank’s interior. Here’s how to tackle them:
Using Vinegar and Baking Soda
- Pour white vinegar into the tank : Fill the tank with enough vinegar to cover the stained areas. Let it sit for 30 minutes to break down the deposits.
- Sprinkle baking soda : Once the vinegar has done its job, sprinkle baking soda over the affected areas.
- Scrub gently : Use a soft scrub brush or sponge to scrub away the loosened deposits. For hard-to-reach spots, grab that old toothbrush we mentioned earlier.
Alternative Methods
- If the stains are particularly stubborn, mix equal parts vinegar and water in a spray bottle and apply it directly to the problem areas.
- For added disinfection, consider using a water-safe disinfectant. Just avoid bleach, as it can harm the tank’s components.

