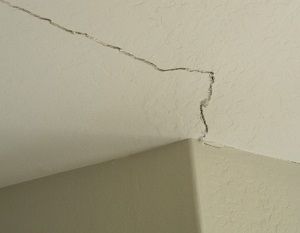
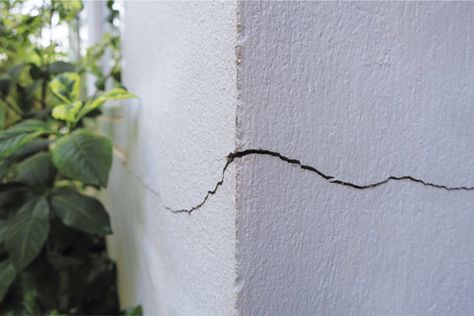
You’ve just noticed that unsightly crack snaking its way across your living room wall. It’s not just a cosmetic issue—it feels like a breach in your home’s safety and charm. For many homeowners, the sight of cracks can trigger anxiety. Is it something minor, or does it signal a bigger problem? I remember the first time I spotted a crack in my own wall. I felt overwhelmed at first, but with the right tools and approach, I turned it into an opportunity to refresh my space.
In this guide, you’ll learn how to quickly repair cracks and crevices in walls, ensuring your home stays beautiful and structurally sound. Whether you’re dealing with hairline fractures or deeper gaps, we’ll walk you through everything you need to know to fix them efficiently.

Understanding the Types of Wall Cracks
Before diving into repairs, it’s essential to understand what kind of crack you’re dealing with. Not all cracks are created equal, and knowing their nature will help you choose the best solution.
Hairline Cracks vs. Structural Cracks
Hairline cracks are thin, superficial fractures often caused by natural settling, temperature changes, or minor shifts in your home’s foundation. These are usually harmless but can become eyesores if left untreated.
On the other hand, structural cracks tend to be wider, diagonal, or stair-step patterns that may indicate more serious issues like foundation movement. If you notice these types of cracks, especially near doorframes or windows, it’s wise to consult a professional for further inspection.
Identifying the Cause Behind Your Wall Cracks
Understanding why cracks form is key to preventing future damage. Here are some common culprits:
- Settlement of the House : Over time, homes naturally settle, which can lead to small cracks.
- Moisture Damage : Excess moisture from leaks or poor ventilation weakens plaster and drywall.
- Poor Construction Quality : Subpar materials or workmanship during construction can result in premature cracking.
- Extreme Weather Conditions : Temperature fluctuations and humidity levels also play a role.
Pro Tip: Keep an eye on recurring or widening cracks. Sudden changes could mean there’s an underlying issue requiring immediate attention.
Tools and Materials You’ll Need for Quick Repairs
Equipping yourself with the right tools and materials ensures a smooth repair process. Let’s break it down:
Essential Tools List
- Spackle Knife or Putty Knife : Ideal for applying filler smoothly.
- Sandpaper (Medium Grit) : Perfect for smoothing out dried patches.
- Painter’s Tape : Protects surrounding areas while painting.
- Caulk Gun : Useful for filling larger gaps.
Materials Checklist
- Joint Compound or Spackling Paste : The go-to filler for most cracks.
- Paintable Caulk : Great for sealing joints and edges.
- Primer and Matching Paint : Ensures seamless blending after repairs.
Recommended Repair Kits by Brand
These kits come highly recommended because they offer convenience and reliability for DIY enthusiasts.
Step-by-Step Instructions to Fix Cracks and Crevices
Now comes the fun part—rolling up your sleeves and getting to work. Follow these steps to achieve professional-looking results.
1: Clean the Area Thoroughly
Start by removing any loose debris around the crack. Use a scraper or vacuum cleaner to clear away dust and dirt. Then, wipe the area with a damp cloth to ensure a clean surface for the filler to adhere to.
2: Apply the Filler
Using a spackle knife, apply joint compound or spackling paste evenly over the crack. For deeper cracks, layer the filler in stages, allowing each layer to dry completely before adding the next. This prevents air pockets and ensures a solid finish.
3: Sand Down the Surface
Once the filler has dried, use medium-grit sandpaper to smooth out the patched area. Be gentle to avoid damaging the surrounding wall. After sanding, dust off any residue with a soft brush or cloth.
4: Prime and Paint
Before painting, apply a coat of primer to seal the repaired area. This step ensures even coverage when you paint. Finally, touch up the spot with matching paint to blend it seamlessly with the rest of the wall.

