
Introduction: A Bite of Bliss
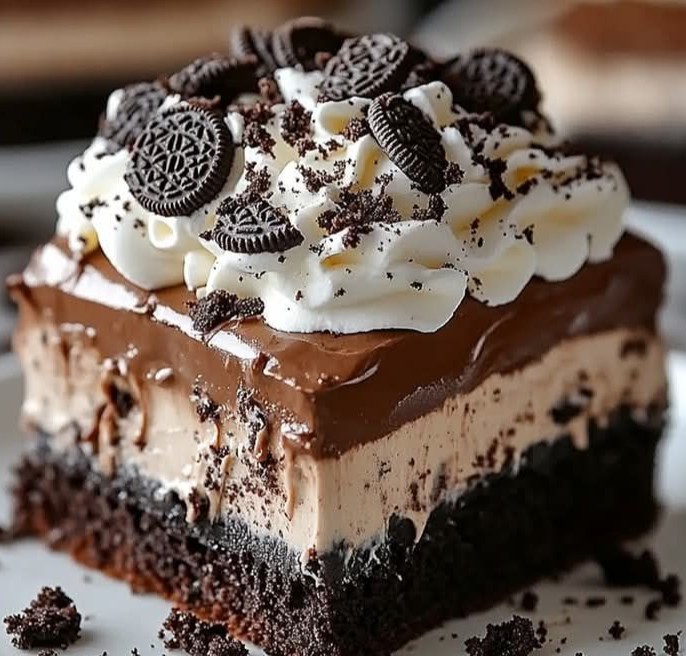
There are times when you’re craving something indulgent but don’t want to go through the hassle of baking. The idea of waiting for the oven to heat up, mixing and measuring ingredients, and then hoping everything turns out just right can feel daunting. Enter the No-Bake Oreo Dessert—a sweet treat that’s as easy as it is delicious. With minimal effort and no oven required, this dessert is sure to become your go-to option when you need something quick, tasty, and impressive.
This dessert is perfect for family gatherings, casual get-togethers, or even just when you’re looking to enjoy something special on your own. It combines the rich, familiar flavor of Oreos with a creamy, smooth filling, all layered into a dessert that’s bound to have your taste buds dancing. Whether you’re a novice or an experienced dessert maker, this No-Bake Oreo Dessert will become your new best friend in the kitchen.
What Is a No-Bake Oreo Dessert?
No-Bake Oreo Dessert is exactly what it sounds like: a no-bake dessert that incorporates everyone’s favorite cookie—Oreos! It requires no oven, and the most you’ll need to do is whip up a creamy filling and press the ingredients into a pan. The simplicity of this dessert makes it accessible for everyone, regardless of your baking experience.
Why Is It So Popular?
The answer is simple—this dessert is incredibly easy to make and doesn’t require any special skills. You don’t need to worry about precise baking times or complicated techniques. Instead, the magic lies in the layers and the perfect combination of crushed Oreo cookies, a creamy filling, and a little time in the refrigerator to set.
Why Choose a No-Bake Oreo Dessert?
If you’re still wondering why this dessert is the right choice, here are some reasons why it should be at the top of your list.
Quick and Easy
Sometimes, you need a dessert that won’t eat up your entire afternoon. No-Bake Oreo Dessert is fast to prepare—most of the time, you’ll need less than 30 minutes of active work. The real waiting time is in the fridge while the dessert sets and firms up, which means you can get back to other things while it works its magic.
No Oven Needed
A significant advantage of this dessert is that it doesn’t require turning on the oven. This makes it ideal for hot days when the last thing you want to do is heat up your kitchen. Plus, it’s perfect for those times when you don’t have an oven handy, such as at a vacation cabin or in a dorm room.
Family-Friendly
Looking for a fun kitchen activity to do with your kids? This recipe is great for getting the whole family involved. Kids can help crush the Oreos, mix the filling, and layer everything in the pan. It’s a great way to teach them some basic cooking skills while having fun together.
Versatile
This dessert is like a blank canvas—it’s easy to modify and personalize. You can experiment with different toppings, add-ins, or even swap ingredients to cater to dietary needs. The possibilities are endless!
Ingredients for the Perfect No-Bake Oreo Dessert
The beauty of a No-Bake Oreo Dessert is in the simplicity of the ingredients. You probably already have most of them in your kitchen!
| Ingredient | Quantity | Notes |
|---|---|---|
| Oreo cookies | 24-30 cookies | Crushed, depending on desired crust thickness |
| Cream cheese | 8 oz (softened) | Essential for creamy texture |
| Whipped cream | 2 cups | Whipped to stiff peaks |
| Powdered sugar | ½ cup | For sweetness |
| Vanilla extract | 1 tsp | Adds a warm flavor depth |
| Butter | ¼ cup (melted) | Used for the crust |
Optional Toppings and Add-ins:
- Chocolate chips
- Mini Oreos
- Crushed candy bars
- Fresh fruit (raspberries, strawberries)
These ingredients are basic, but you can get creative with what you add. Whether it’s extra layers of crushed Oreos, a drizzle of chocolate syrup, or a sprinkle of your favorite candy, you have the freedom to make this dessert your own.
Step-by-Step Instructions for Making No-Bake Oreo Dessert
Now that you know what you’ll need, let’s dive into the process of making this delicious dessert. The steps are simple and will guide you to a perfectly set dessert.
1. Prepare the Oreo Base
- Crush the Oreos: Start by crushing your Oreos into fine crumbs. You can do this by placing them in a ziplock bag and smashing them with a rolling pin or using a food processor. Aim for fine crumbs for a smoother crust.
- Mix with melted butter: Pour the melted butter into the crushed Oreos and stir until everything is well-coated. The butter helps bind the crumbs together and gives the crust a firm texture.
- Press into the pan: Using your hands or the back of a spoon, press the mixture into the bottom of your baking dish to form a solid crust. Make sure it’s evenly spread out. This is the foundation of your dessert.
2. Create the Cream Layer
- Mix cream cheese and powdered sugar: In a mixing bowl, combine the softened cream cheese and powdered sugar. Blend them until smooth and creamy. This layer will give your dessert its rich, velvety texture.
- Add the whipped cream: Gently fold the whipped cream into the cream cheese mixture. Be careful not to deflate the whipped cream; fold it in slowly to maintain the airy texture.
- Spread over the Oreo crust: Once your cream mixture is smooth and fluffy, spread it evenly over the Oreo base. Use a spatula to make sure it’s evenly distributed.
3. Assemble the Dessert
- Layer your ingredients: After you’ve spread the cream layer over the crust, you can add an extra layer of crushed Oreos or chocolate chips if you like. Press them gently into the cream layer for some texture.
- Refrigerate: Cover the pan with plastic wrap and place it in the fridge. Let it chill for at least 4 hours, or overnight if you have the time. The longer it sits, the better the flavors meld together and the firmer the dessert becomes.
4. Garnish and Serve
- Add the finishing touches: After the dessert has set, garnish it with more crushed Oreos, chocolate syrup, or your favorite toppings. Serve it cold for a refreshing treat that will surely satisfy your sweet cravings.
Tips and Tricks for the Best No-Bake Oreo Dessert
Here are some tried-and-true tips to make sure your No-Bake Oreo Dessert turns out perfectly every time.
- Chill It Long Enough: Don’t rush the setting process. The dessert needs time to firm up in the fridge, so be patient and give it at least 4 hours, preferably overnight.
- Use Full-Fat Ingredients: For the creamiest, richest dessert, opt for full-fat cream cheese and heavy whipping cream. These ingredients provide the best texture and flavor.
- Add Extra Layers: If you love Oreos, consider adding extra layers of crushed cookies in between the cream layers. This will give the dessert more texture and depth.
- Customize: Feel free to add your personal touch with different types of Oreos (like mint, peanut butter, or birthday cake flavor) or layer in some chocolate ganache for added richness.

No-Bake Oreo Dessert Variations
You don’t have to stick to the classic recipe! There are plenty of ways to put your own spin on this dessert. Here are a few ideas:
Chocolate Oreo Dessert
For chocolate lovers, add a layer of chocolate pudding or melted chocolate to the dessert. The creamy chocolate layer will complement the Oreos perfectly.
Peanut Butter Oreo Dessert
Incorporate peanut butter into the cream cheese layer for a rich, nutty flavor. This is a great option for peanut butter fans and adds a delicious contrast to the sweetness of the Oreos.
Mint Oreo Dessert
If you’re a fan of mint chocolate, use mint-flavored Oreos and add a few drops of peppermint extract to the cream layer. This variation is perfect for the holidays or any time you want a refreshing twist.
How to Serve and Store Your No-Bake Oreo Dessert
Serving Suggestions
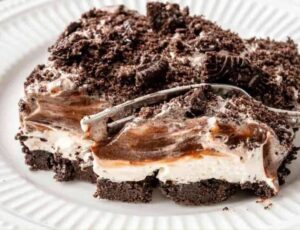
This dessert is best served chilled, directly from the fridge. You can cut it into squares for a casual serving or serve individual portions for a more elegant presentation. If you’re hosting a dinner or party, add some fresh whipped cream or a scoop of vanilla ice cream on the side.
Storage Tips
Leftovers can be stored in an airtight container in the fridge for up to 3 days. If you want to keep it longer, you can freeze the dessert for up to a month. Just make sure to let it thaw in the fridge before serving for the best texture.
Frequently Asked Questions (FAQ) about No-Bake Oreo Dessert
-
Can I use regular Oreos or are there special Oreo varieties for this dessert?
- Regular Oreos work just fine! But feel free to experiment with different varieties of Oreos, such as mint, peanut butter, or birthday cake, for added flavor.
-
How long does the No-Bake Oreo Dessert need to set in the fridge?
- For the best results, refrigerate the dessert for at least 4 hours. However, overnight is recommended to ensure it’s firm and flavorful.
-
Can I make this dessert ahead of time?
- Absolutely! In fact, making it a day in advance is ideal, as it gives the flavors more time to develop and the dessert to set properly.
-
Can I substitute whipped cream with something else?
- You can use store-bought whipped topping as a substitute for fresh whipped cream, but homemade whipped cream tends to give the best texture.
Conclusion: Enjoy Your No-Bake Oreo Dessert!
This No-Bake Oreo Dessert is the perfect solution for anyone who loves sweets but doesn’t want to deal with complicated recipes or heat up the kitchen. It’s easy to make, versatile, and guaranteed to impress anyone you serve it to. Whether you’re making it for a special occasion or just because, this dessert is bound to become a favorite in your home. So, grab your ingredients, and get ready to enjoy a treat that’s as fun to make as it is to eat!